Honghe Machinery
The CNC Glass Internal Engraving Machine opens up new possibilities in glass artistry and personalization. This advanced technology allows creators to etch intricate designs within glass, enhancing its visual appeal. Many enthusiasts are eager to learn how to use this machine effectively. However, mastering it requires practice and patience.
Using a CNC Glass Internal Engraving Machine involves specific techniques and settings. Inconsistent results can occur if the wrong speeds or depths are chosen. Beginners often face challenges, such as not achieving the desired level of detail. It's essential to test different settings on scrap glass before committing to a final piece.
Moreover, understanding the material is key. Glass can behave unpredictably during engraving. Marking imperfections and adjusting accordingly is vital. Often, users overlook the importance of maintenance for the machine, leading to decreased performance. Reflecting on these aspects can improve outcomes and enhance creativity.
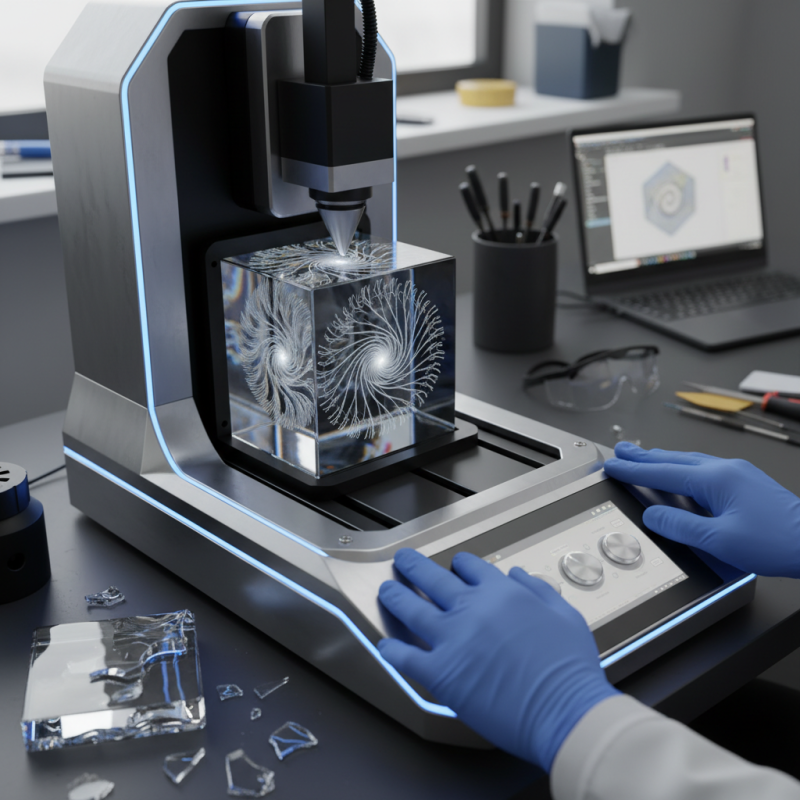
CNC glass internal engraving machines are intricate tools. They create stunning designs within glass surfaces. Understanding how they work is key for effective use. The machine uses a computer numerical control system. This allows for precise cuts and engravings.
When starting, ensure the glass is properly secured. Loose glass can shift during engraving. This causes inaccuracies. Before engraving, always run test designs on scrap glass. It’s a simple step but vital for success. Errors can emerge from unexpected machine behavior.
Tip: Regular maintenance of the machine is essential. Clean the engraving bits frequently. This prevents buildup that could affect performance.
Another important point is design preparation. The software used should match the machine's capabilities. Complex designs might require adjustments. Keep it simple initially, then refine as you gain confidence. Experimentation is encouraged. Be prepared for mistakes and learn from them. Each error presents a chance to improve your technique.
When using a CNC glass internal engraving machine, key features are crucial for effective operation. Consider the precision of the machine. A report by the International Society for Optics and Photonics shows that machines with a tolerance of 0.01 mm enhance engraving quality. This precision ensures sharp details in your designs.
Another important specification is speed. Data indicates that machines with a higher RPM (up to 20,000) can significantly reduce operation time. However, high speed may affect engraving clarity. Balancing speed and quality is not straightforward. Engravers often face trade-offs between efficiency and the detailed finish.
Software compatibility is often overlooked. It’s vital to ensure that the machine can work with popular design software. This integration streamlines workflow and reduces setup time. Be aware, though, that some software might not fully utilize the machine's capabilities. Regularly checking for updates can prevent this issue and improve performance over time. Remember, even advanced machines can have quirks that require ongoing adjustments.
Setting up a CNC glass internal engraving machine can be quite a task. Begin by ensuring that the machine is placed on a stable surface. Leveling the base is crucial for accurate results. Use a spirit level to check alignment. This step is often overlooked, yet it can cause significant errors in engraving.
Next, calibrate the machine. This includes setting the axes and ensuring they move smoothly. Use the software interface to adjust the parameters. Pay attention to the speed and feed rates; they must be suitable for glass. It’s easy to make mistakes here. A wrong setting can crack the material or produce poor quality results. Take your time, and don’t rush through the calibration process.
After calibration, run a few test engravings. This is where imperfections often arise. Monitor the engraving closely. If there are issues, like misalignment or depth inconsistencies, revisit the settings. Evaluate the finished test piece and reflect on the process. Practice makes perfect, and each engraving teaches you something new. Aim for consistent quality with every project.
Creating stunning engravings on glass requires careful planning. Designing your engraving patterns can be an exciting yet challenging task. Start by sketching your ideas on paper. This can help you visualize the layout. Consider using software for precise designs. Vector graphics work best for cutting. Choose a design that fits the glass surface to avoid awkward placements.
Importing your designs into the CNC machine is critical. Keep the file format compatible with your machine's software. Incomplete files can lead to errors. Always double-check dimensions before starting the engraving. Sometimes, the design may shift slightly during the import process. Be aware of this to avoid misalignment.
Tips: Always test the design on a scrap piece first. This helps you catch any mistakes. Adjust the machine settings according to glass thickness. Certain settings can make a huge difference. You want clarity in your engraving, not a hazy look. Lastly, remember that practice makes perfect. Don't be discouraged if the first attempt fails. Learning from these attempts is key.
CNC machines require regular maintenance to function optimally. Inspecting the machine regularly can prevent major issues. Check the coolant levels frequently. Low coolant can lead to overheating and damage. Clean the cutting tools to maintain precision. Clogged tools can cause poor engraving quality.
When troubleshooting, listen for unusual sounds. Grinding or squealing can indicate wear. Verify that all software settings are correct. Misalignments often stem from software errors. Ensure the glass is securely positioned. A loose workpiece can shift during engraving, ruining the design.
Document your maintenance practices over time. This can help identify recurring issues. Sometimes, a simple adjustment can solve complex problems. Reflect on past engravings to improve future projects. Learning from mistakes fosters growth in CNC operation.
: It is a tool that creates designs within glass surfaces using computer numerical control.
Loose glass can shift, leading to inaccuracies during the engraving process.
Always run test designs on scrap glass to identify potential issues.
Regular maintenance is essential; clean engraving bits to prevent performance issues.
Ensure your design software matches the machine’s capabilities and start simple.
Reflect on the errors. Each mistake is a chance to improve your technique.
Place it on a stable surface and use a spirit level to check alignment.
Set the axes accurately and adjust speed and feed rates suitable for glass.
Look for issues like misalignment or depth inconsistencies while engraving.
Each project can teach you about improving quality and refining your technique.
The article "How to Use a CNC Glass Internal Engraving Machine Effectively?" provides a comprehensive guide for users looking to maximize their engraving capabilities. It begins with an overview of CNC Glass Internal Engraving Machines, explaining their fundamental operation and the specific features that enhance their performance. Understanding these basics is crucial for selecting the right machine for various engraving tasks.
Additionally, the article outlines a step-by-step setup and calibration process essential for achieving precise engravings. It covers techniques for designing and importing patterns, ensuring that users can create custom graphics suited to their needs. Finally, the article highlights best practices for maintenance and troubleshooting, providing users with strategies to extend the life of their CNC machines and ensure consistent performance. By following these guidelines, operators can effectively use CNC Glass Internal Engraving Machines for intricate and detailed work.